This document can help you take, inspect, and then upload Chromebook screenshots. When you take a screenshot, Chromebook automatically saves it as a Portable Network Graphics (PNG) file in your Downloads folder. After inspecting the screenshot, you can make it more accessible by uploading it to Google Drive.
Taking a screenshot
To record content displayed on a Chromebook screen, you can take either a full or partial screenshot.
Taking a full screenshot
To take a screenshot of a full Chromebook screen, do the following:
- Display the screen that you wish to record.
- As shown in Figure 1, press Ctrl+[switch windows] to take the screenshot and display a brief 'screenshot-taken' message.
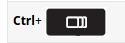 |
| Figure 1 - Full screenshot keys |
- Inspect your screenshot according to the Inspecting your screenshot section below.
Taking a partial screenshot
To take a screenshot of only part of a Chromebook screen, do the following:
- Connect a mouse to your Chromebook. Note: Though you can use the touchpad for this procedure, I recommend a mouse because it makes drag-and-drop tasks much easier.
- Display the screen that you wish to record.
- As shown in Figure 2, press Ctrl+Shift+[switch windows] to replace your mouse pointer with a small cross symbol.
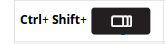 |
| Figure 2 - Partial screenshot keys |
- Select the area of your partial screenshot as follows:
- Move the cross to any corner of the area you wish to record.
- Click and hold the left mouse button
- Drag the cross until the selection box encloses the screenshot area precisely.
- Release the left mouse button to take the screenshot and display a brief 'screenshot-taken' message.
- Inspect your screenshot according to the Inspecting your screenshot section below.
Inspecting your screenshot
Inspecting your screenshot immediately helps save time; reconstructing your project's current conditions later might be difficult. To inspect your screenshot, do the following:
- Take a screenshot according to the Taking a screenshot section above.
- As shown in Figure 3, click the Apps launcher (at lower left of the desktop) to display your apps.
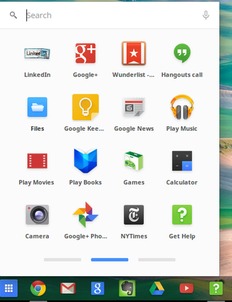 |
| Figure 3 - App icons on Chromebook |
- As shown in Figure 4, click the Files app icon to display its window.
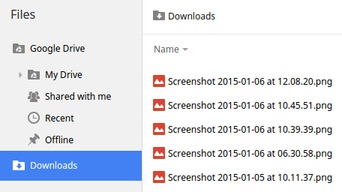 |
| Figure 4 - Downloads folder with screenshots |
- Within your Downloads folder, double-click your screenshot to view it in Chromebook's built-in photo editor:
- If the screenshot appears as you had intended, close the editor, and then take whatever other screenshots you need for your current project.
- If the screenshot does not appear as you had intended, close the editor, delete the screenshot file from the your Downloads folder, and then take that screenshot again.
- Continue according to the Uploading screenshots to Google Drive section below.
Uploading screenshots to Google Drive
You can use any computer to access your Google Drive applications and files through your Google account. Therefore, uploading your Chromebook screenshots to Google Drive makes them easily available for use in your various projects, such as word-processor documents and web sites. To upload your screenshots to Google Drive, do the following:
- Click the Apps launcher to display your apps, and then click the Drive app to open it.
- Click New, and then click File upload to display its window.
- Select the Downloads folder, and then select one or more screenshot PNG files that you wish to upload.
- Click Open to upload your screenshot(s).
No comments :
Post a Comment